GVExample TOUPPER
Description
This simple example shows how to design a simple synchronous service and its configuration using Developer Studio. This service accepts a string as input, then returns it converted to uppercase.
How To
First of all we have to create a new Vulcon project:
- From the Menu panel of Developer Studio, click on: File -> New -> Project. A new window will be opened containing the projects type.
- Expand Vulcon folder, then select New Vulcon Project item. Then click Next.
- Set the project name and its location. Set the name as GVEXAMPLE and choose a Location in your file system. Then click finish. The new VulCon project GVEXAMPLE has been created.
Before to create the service, first you have to configure the test VCL plugin tho execute the uppercase conversion. So let’s define a new System and Channel.

From the Systems view:
- Right click on Systems - Systems -> insert-after -> System. A new element System, marked with a red X, will be created (to see it, you have to expand Systems - Systems).
- Set the System parameters in the Properties panel below. Set the id as GVESB_TEST (BASIC -> id-system = GVESB_TEST). Press Enter every time you insert a field!
- Now you can insert a new Channel right clicking the new System element -> Insert after -> Channel. A new Channel element will be created.
- Right click on this new Channel element and set the property id_channel. Set the id as TEST_CHANNEL. (BASIC -> id-chanel = TEST_CHANNEL).
- Finally, insert the operation you need for the workflow. In this case a test-service-call. Right clicking Channel -> Insert after -> test-service-call. A new element test-service-call will be created.
- Set the test-service-call attributes. From the properties view set the name attribute as test and the service attribute as toupper.
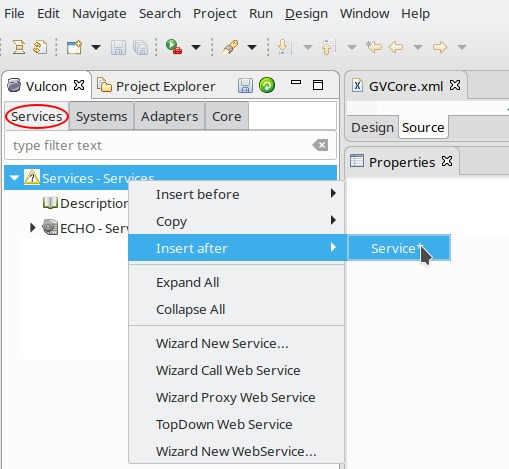
From the Services View of VulCon:
- Right click the element Services -> Insert after -> service.
- Set id-service as TOUPPER and group-name as DEFAULT_GRP
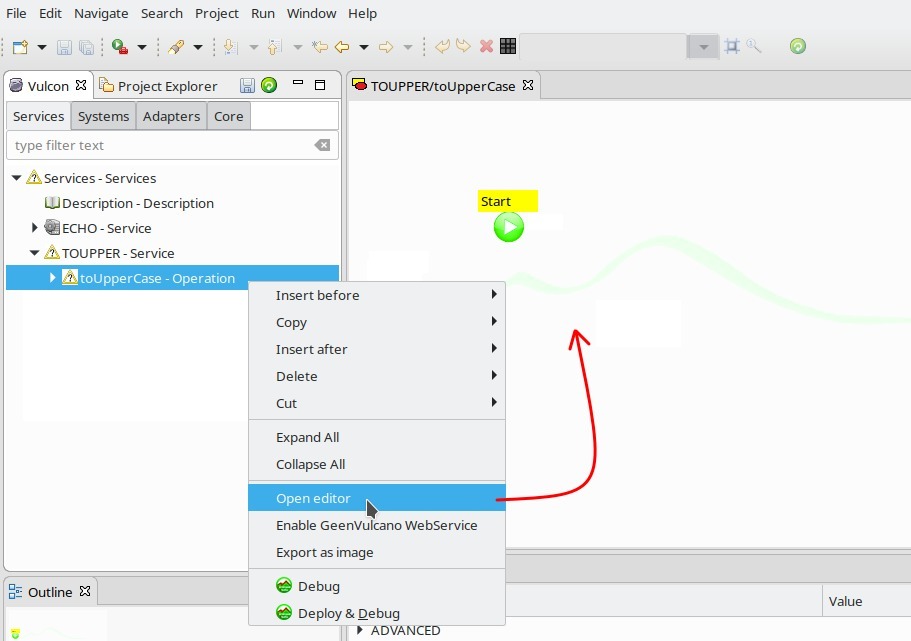
- Right click on the new service element -> Insert After -> Operation
- Set the name of the new operation as toUpperCase
- Now, Right click on the new operation -> Open editor
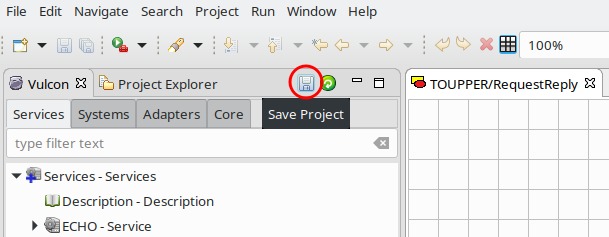
Before to proceed, save your Vulcon project!
- Save clicking the Save icon from the Core View.
Now you have to create a flow like this:
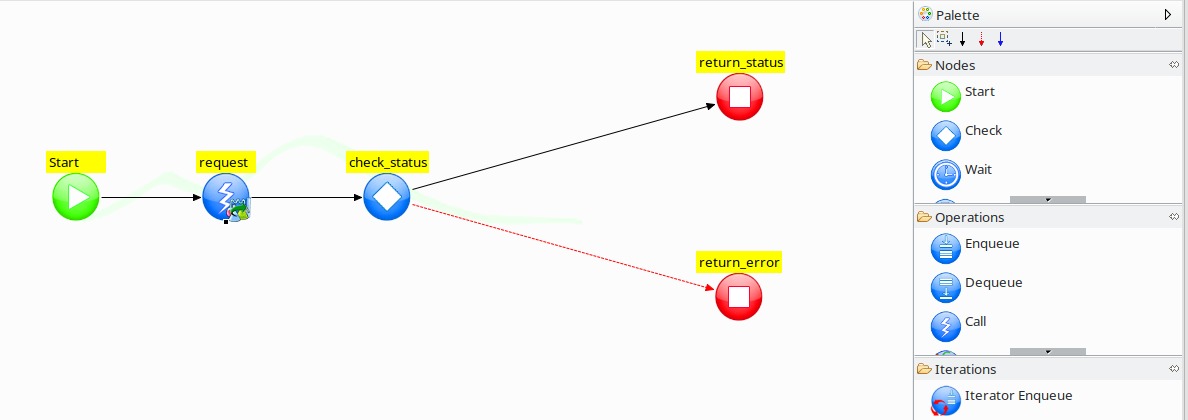
To do this, use the Palette on the right:
- grab an element and drag it on the editor, then set the id as the element’s label in the picture.
- to link two elements use the arrow tool.
Then, you have to set all the elements attributes:
| ID - (Element type) | attributes |
|---|---|
| Start | no attributes |
| (Start node) | |
| Request | operation-name=test |
| (GVOperationNode) | op-type=call |
| ID-CHANNEL | |
| input=input_op | |
| next-node-id=check_status | |
| id-system=GVESB_TEST | |
| id=request | |
| output=output_op | |
| check_status | input=output_op |
| (GVNodeCheck) | id=check_status |
| on-exception-id=return_error | |
| default-id=return_status | |
| return_status | output=output_op |
| (GVEndNode) | id=return_status |
| return_error | output=output_op |
| (GVEndNode) | id=return_error |
Elements explanation:
- The Start node sets the flow first node. In this case request
- The Operation node request calls the test-service-call operation test and executes it.
- A Check node named check_status is also inserted for controlling the success of the preceding node.
- If success flow passes to the End node return_status
- In case of Error, flow goes to the End node return_error. The difference with return_status is signed by the Connection with check_status Check node. In this case an Error Connection (the Red arrow) have been used.
- Save clicking the Save icon from the Core View.
Clicking on Project Explorer -> GVEXAMPLE -> GVCore.xml you can see the configuration file.
GVCore.xml will be changed as follows:
- Into Groups element will be added the tag
<Group group-activation="on" id-group="DEFAULT_GRP"/>
- Into Services element will be added the tag
<Service group-name="DEFAULT_GRP" id-service="TOUPPER" service-activation="on"
                     statistics="off">
  <Operation class="it.greenvulcano.gvesb.core.flow.GVFlowWF"
                           name="ToUpperCase" operation-activation="on" type="operation">
     <Flow first-node="request">
       <GVOperationNode class="it.greenvulcano.gvesb.core.flow.GVOperationNode"
                               id="request" id-channel="" id-system="GVESB_TEST"
                               input="input_op" next-node-id="check_status"
                               op-type="call" operation-name="test"
                               output="output_op" point-x="210" point-y="199"
                               type="flow-node"/>
       <GVNodeCheck class="it.greenvulcano.gvesb.core.flow.GVNodeCheck"
                               default-id="return_status" id="check_status"
                               input="input_2" on-exception-id="return_error"
                               op-type="check" point-x="405" point-y="206"
                               type="flow-node"/>
       <GVEndNode class="it.greenvulcano.gvesb.core.flow.GVEndNode"
                               id="return_status" op-type="end" output=""
                               point-x="576" point-y="52" type="flow-node"/>
       <GVEndNode class="it.greenvulcano.gvesb.core.flow.GVEndNode"
                               id="return_error" op-type="end" output="" point-x="644"
                               point-y="331" type="flow-node"/>
     </Flow>
   </Operation>
 </Service>
- Into Systems element will be added the tag
<System id-system="GVESB_TEST" system-activation="on">
    <Channel id-channel="TEST_CHANNEL">
        <test-service-call class="it.greenvulcano.gvesb.virtual.internal.TestServiceCall"
                           name="test" service="toupper" type="call"/>
    </Channel>
</System>
Now you are able to test your first VulCon Service from the GV Console®. But first you need to export the configuration.
Once the flow is correctly configured, the user can export the configuration and pass it to the GreenVulcano® ESB import tool, in order to add into the GreenVulcano® ESB the service just created.
- Click on File -> Export.
- Expand the element VulCon Export Tool and select VulCon Project. Click on Next button.
- Select the project GVEXAMPLE and the output location of the zip file. Then Click Finish.
Testing with GV Console
It is finally the time to test your project. To do that execute the following steps:
Suppose you have saved the VulCon project as GV_TOUPPER.zip. To deploy the new Service follow this steps:
- Start GreenVulcano® ESB
- Access to the GV Console (http://localhost:8181/gvconsole/#/login - Username:gvadmin - Password:gvadmin).
- Go in the Deploy section and click on the add version button: the Add version window will be opened.
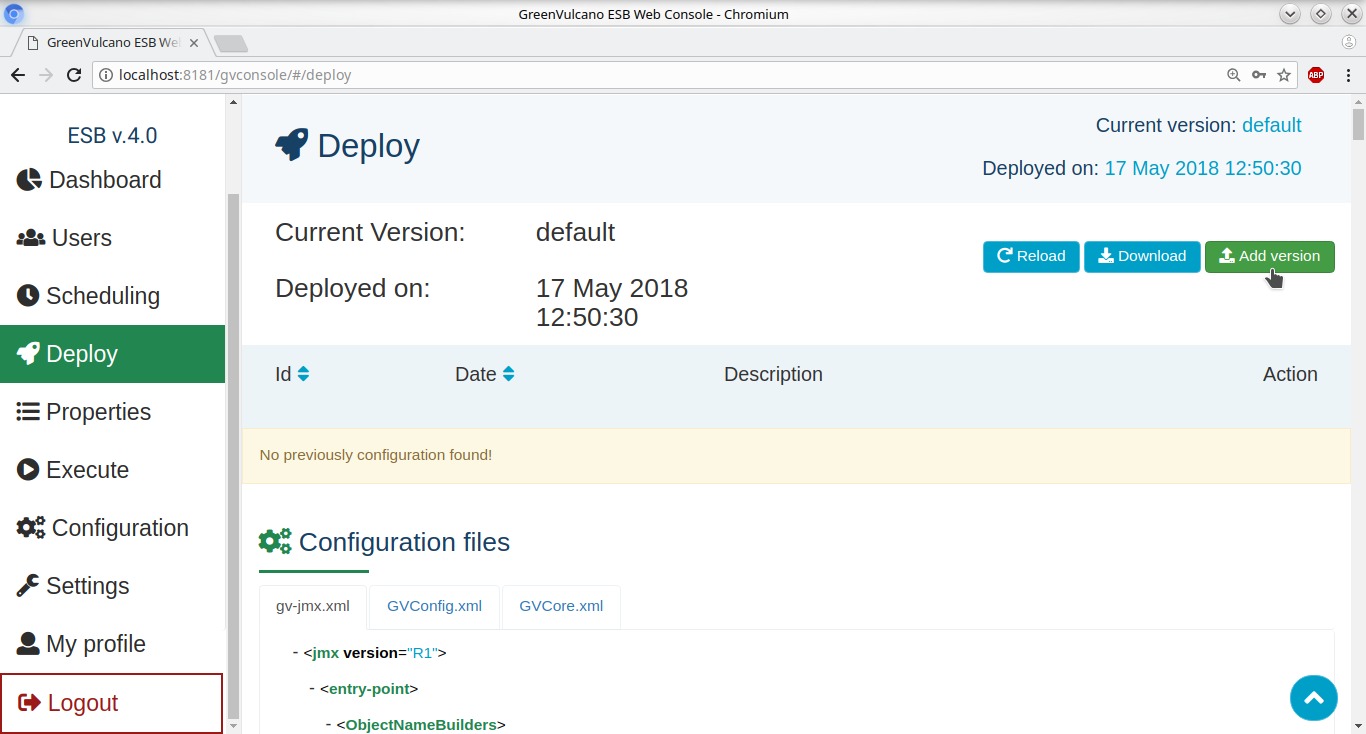

- Set Configuration ID, Description and select the zip configuration file. Then click on Save button. The new configuration will be added.
- Now you can deploy the configurtion using the Deploy button.

- In the next window click on Next -> Next -> Proceed
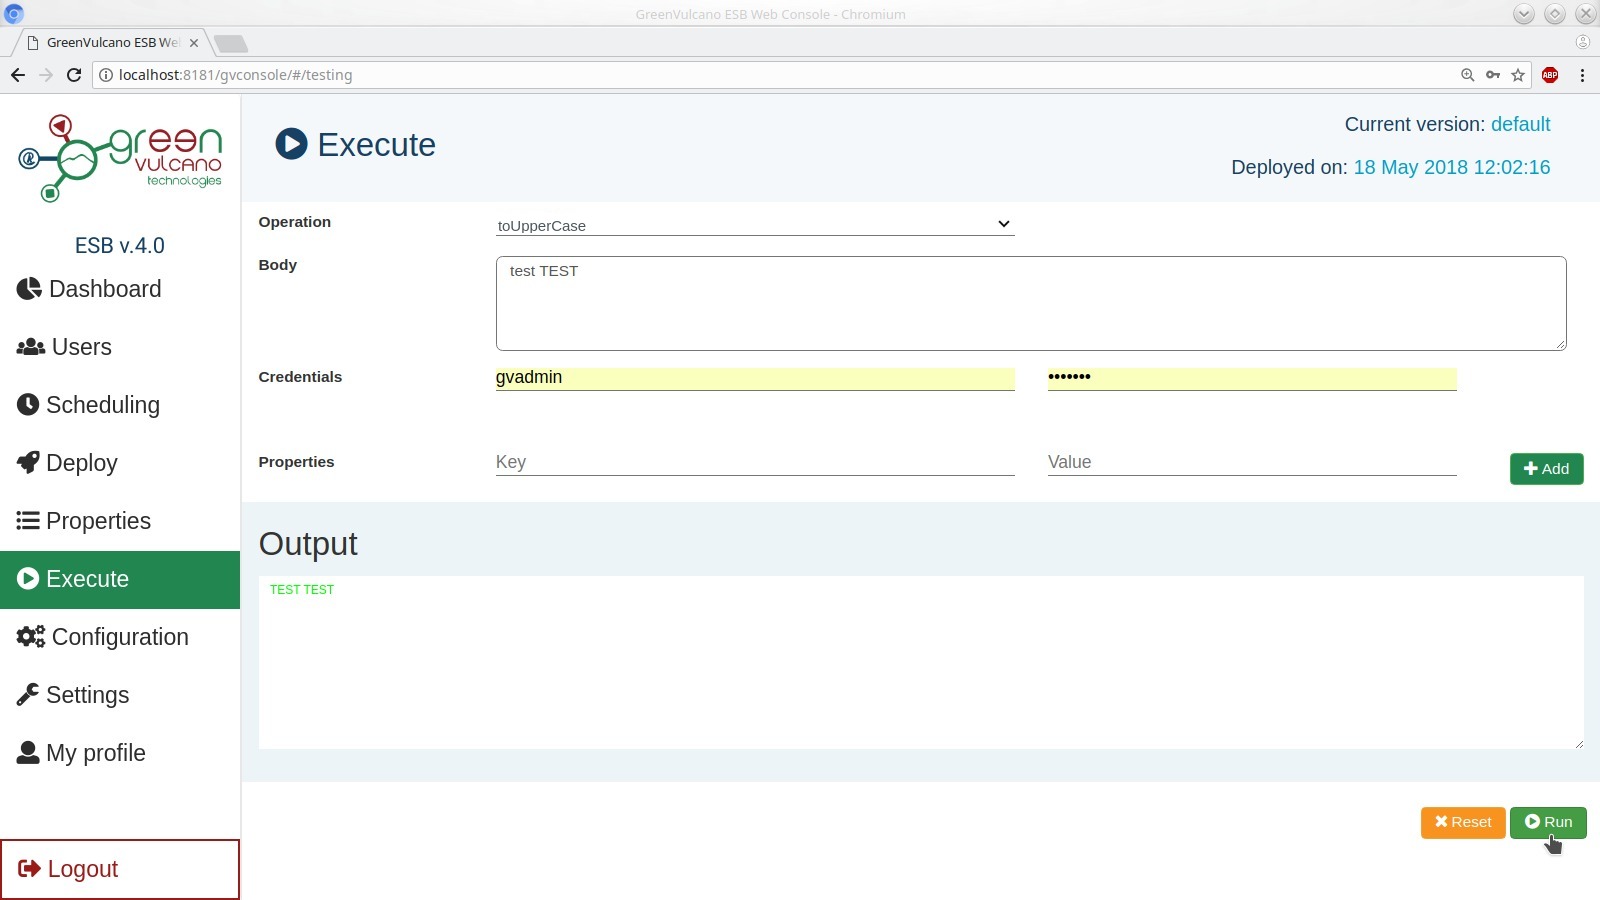
- Once the configuration is deployed you can finally test it. Go to Execute section end test TOUPPER operation.
Note: In case of error or exceptions you can check the file GVCore.log situated in the folder GV_HOME/data/log/.
Here you can download the TOUPPER configuration: